You can select one or more samples to set as reference to match and compare to all samples on a selected table. The results can show you which locus are an exact match, included, or foreign to the set reference(s). This guide explains how to perform the match and comparison.
Select Reference(s)
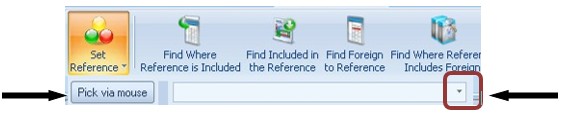
You can set any sample or samples as reference(s). Click on the Set Reference button to open the select/pick via mouse window.
Clicking the ▼arrow will provide a drop down list of all available samples from which you can select the appropriate sample.
Clicking on the pick via mouse option will allow you to select the sample using your mouse.
To select more than one sample as references, click on the Pick via mouse button and hit the Ctrl button on your keyboard. Then select samples with your mouse while keeping the Ctrl button pressed.
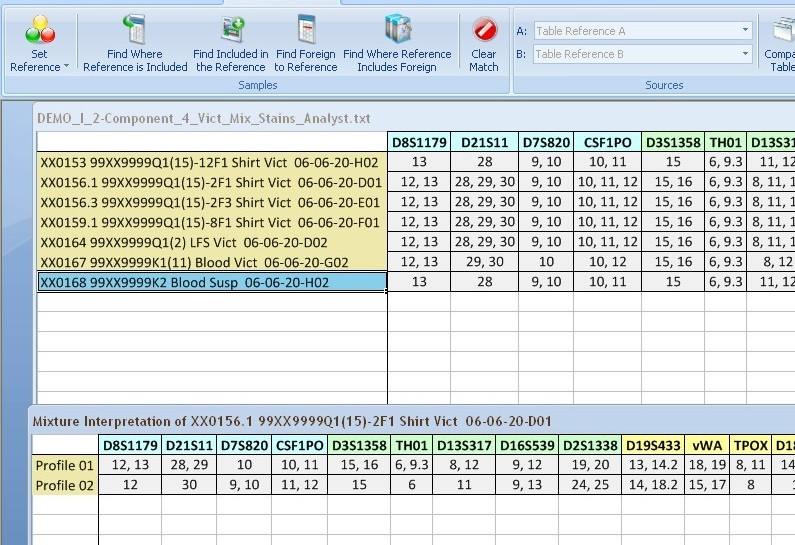
The selected reference(s) will be highlighted in blue.
There are two additional quick ways to choose your reference.
You can also click on the appropriate sample that you want to set as a reference and hit the F1 key. This will automatically highlight the sample you are on and start the “Find Where Reference is Included” comparison.
You can also just select with your mouse the sample(s) that you would like to set as the reference, then click one of the compare buttons.
These two only work if the reference is on the same sample table as the one that you want to match and compare to.
Select Sample Table to Compare With
Once you are finished selecting your reference(s), click on the sample table that you would like to match and compare.
This does not have to be the same sample table as the selected reference(s). This is useful to compare a reference to a mixture interpretation call report.
Choose Comparison Button
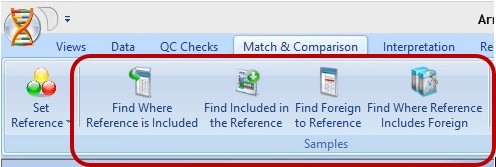
Click on one of the four compare buttons: Find Where Reference is Included, Find Included in the Reference, Find Foreign to Reference, or Find Where References Includes Foreign.
Find Where Reference is Included is used to find loci that include the reference. All loci that contain an exact match to the reference are highlighted orange. All loci that contain the reference and additional allele(s) are highlighted yellow.
Find Included in the Reference is used to find loci that are included in the reference. All loci that contain an exact match to the reference are highlighted orange. All loci that contain the part of the reference and no other allele(s) are highlighted yellow.
Find Foreign to Reference is used to find loci that contain allele(s) that do not match the reference. All loci that contain allele(s) that do match the reference are highlighted red.
Find Foreign to Reference is used to find loci that do not contain the reference. All loci that do not contain the reference are highlighted red.
What is shown on report.
All matches are highlighted in a different color based on type of match. There is a key on the bottom of the page
In addition, shown highlighted in blue on the bottom or top of the page is the selected reference depending on your chosen options. To choose the default location for the chosen reference, go to the General section under the ArmedXpert Options Window. To appear on the top, the box next to List match & compare reference at the top should have a check mark. Click on the box, to have the check mark appear or disappear.

To the right of the samples are total columns. These columns give a total number of each type of matches. You can also do automatic sorts for these columns, by enabling the correct default sort. To change the default sort, go to General section under the ArmedXpert Options Window. Select the desired sort option.
