This guide walks you through make the calls for each profile in the Mixture Interpretation Tool.
The Mixture Interpretation Window has are three different ways to make profile calls.
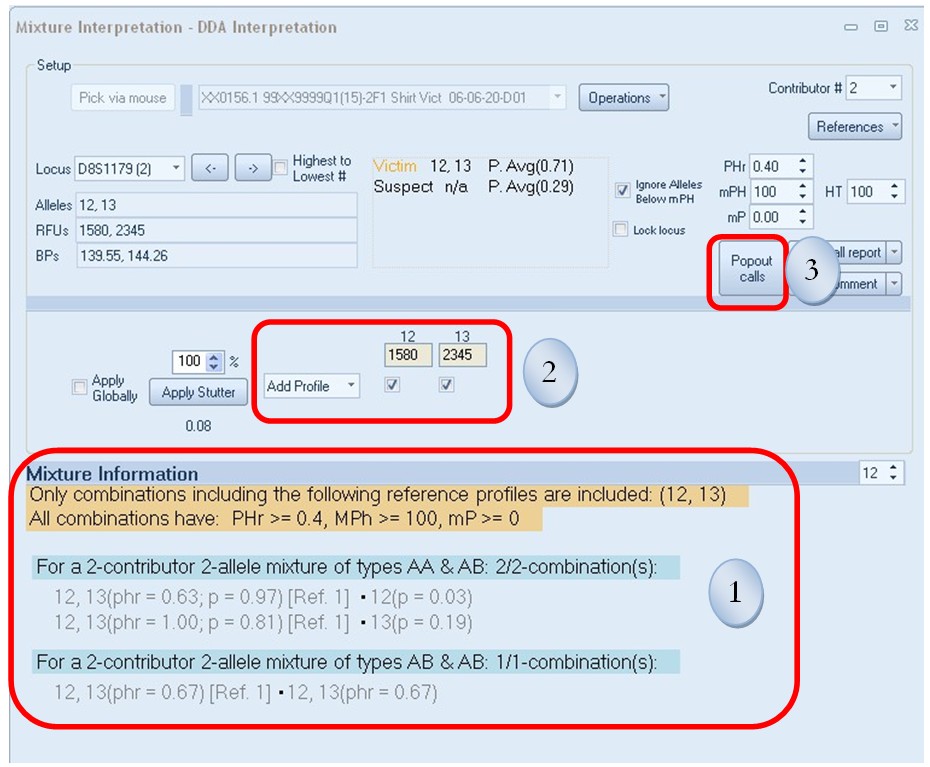
1st Option: Right Click and Chose Combination on the bottom portion of the tool.
The Send to Profile 1 and Send to Profile 2 buttons will appear. If you are doing a 3 contributor mixture interpretation, a Send to Profile 3 button will appear also. Right click on the genotype combination in the combination row you would like to call and select the particular profile by clicking the appropriate “Send to Profile 1, 2, or 3” button. Then repeat for the next profile until all profiles have been chosen. Once selected the information will be appear in blue as show in the example below in Figure 7.15, Genotype 12, 13 is applied to Profile 1 (Victim) and Genotype 13, 13 is in process of being applied to Profile 2(Suspect).
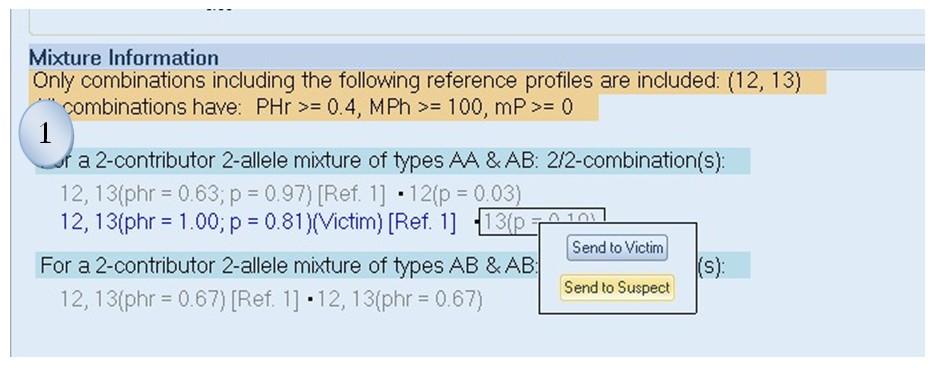
2nd Option: Manually Select Alleles in the Middle Section of the tool
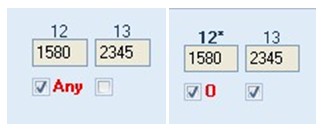
Click on the Profile you would like to make a call for and then click on the boxes under the allele(s) you would like to select. A check mark will appear in the boxes selected. If you would like to make one of the alleles as an Any or an Obligate, right click on the checkmark box and a drop down list will appear. You can also use this feature to remove or ignore an allele. Select the appropriate option. As shown in below, the word “Any” will appear left of the chosen allele if any is selected and a “0” will appear left of the chosen allele if an obligate is selected.
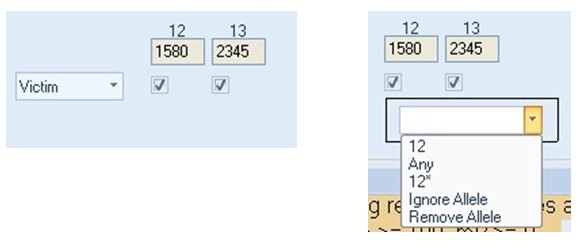
3rd Option: Use the Popout Calls Feature
Click on the Popout calls button. A window will appear as shown below. You can click on the box under the allele you would like to select for each Profile. A check mark will show on all selected alleles. By reclicking on a box that contains a checkmark, it will be removed. If you would like to call an Any or an Obligate, right click on the box under the appropriate allele and across from the right profile, a drop down list will appear as seen in image below. You can then click on the appropriate choice. You can also delete an allele using the drop down list.
Once chosen, you can move to a different Locus using the <- or -> arrows next to the Locus to move forward or backward or click on the ▼arrow on the Locus box to move to a specific locus. You can close this window by clicking on the X in the upper right hand corner.

NOTE: Once you make a call with any of the methods, it will be recorded in all the methods. Therefore, you can change methods throughout the mixture interpretation, without losing any calls already made using one of the other methods For example, once 12, 13 were called for Profile 1, it was highlighted blue in Method One and check marks were recorded marking alleles 12, 13 in Methods 2 and 3.
Navigation to each Locus
There are a few different ways to navigate to different Locus in the Mixture Interpretation Window. You can use the method explained above in the Popout calls Window. You can click on the ▼arrow next to “Locus Box” for a drop down list of all loci and then individually select the locus. Finally, you can click the <- or -> arrows to move either forward or backward to a different locus.
