How to Commit a Table or Sample to Database
This guide will show you how to commit a table or a sample to the database. The Commit Samples to Data Source allows you to save or commit a sample to your database and the Load Samples to Data Source allows you to retrieve it. One example of a use for this is to commit your staff profiles to the Database so they can be retrieved for use later to compare against. Any sample can be saved or committed to your database
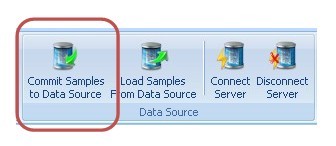
Open Table and Click on Commit Samples to Data Source button:
To commit a sample from a sample table as a table, click on the sample table so it is open and active on the screen. Click on the Commit Samples to Data Source button.
Choose Table(s) and/or Sample(s)
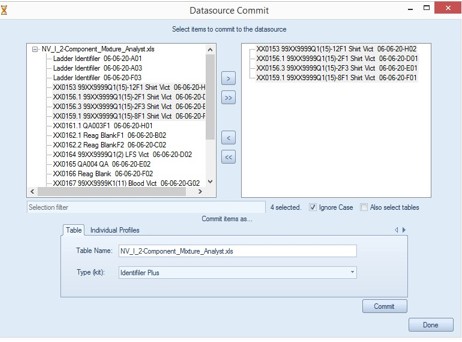
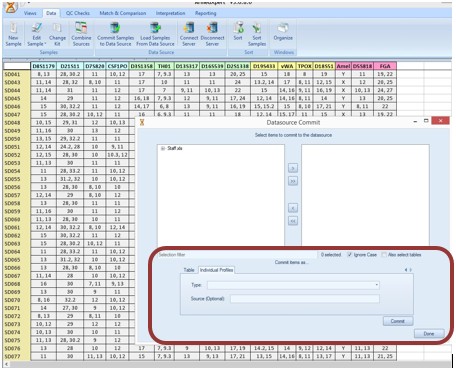
The Datasource Commit window will appear. Click on the + next to the Sample Table and all the samples on the sample table will appear on the left hand side of the window. Click on the sample or table you wish to commit, click the > button, and the sample or table will be move to the box on the right. Repeat this for as many samples as you wish to commit.
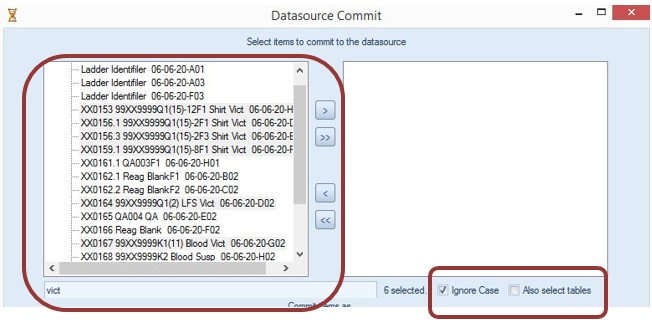
You can also use the Selection Filter box to enter in a specific name and all samples containing that name will be highlighted. This is helpful in finding certain samples in a large sample table. Click the > button and all samples highlighted will move to the right hand box. As shown below, the word Vict was added to the Selection Filter box and all samples that include the word Vict are highlighted. The “Ignore Case” option allows all forms of the filter to be highlighted regardless of lower or upper case. The “Also select tables” option allows for tables to also be highlighted. In the example shown below, the “Also select table” option is not checked so even though the table contains the word Vict, it is not highlighted.
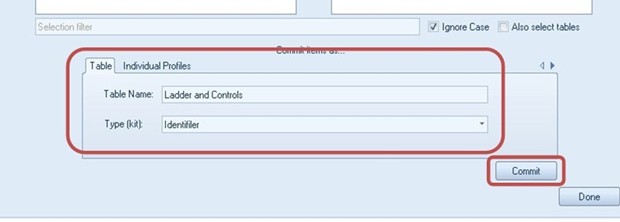
Fill in the Table Name and Kit, then Commit
The table name and Type (kit) will be filled in; you can change these if wanted. Once finished choosing samples and all info is filled in correctly, hit the “Commit” button. When finished with the window, hit the “Done” button to close the window.
Committing Individual Profiles
You can commit individual profiles such as staff profiles, QA profiles, and SRM profiles. Click on the appropriate sample table so it is open and active on the screen. Then click the Commit Sample to Data Source button. All the individual samples will show on the right side of the window (our staff profile example is shown as alphanumeric as opposed to names). Click on the sample you would like to commit and click the > button to move it to the left side of the window or click the >> button and all the samples will move to the left side of the window.
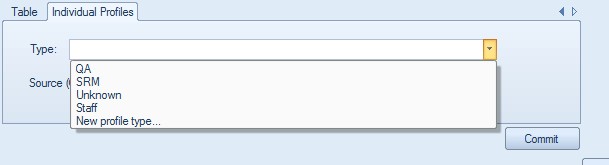
Click on the Individual Profiles tab. Choose type of profile you are adding from the drop down menu next to the “Type” box. The options are shown below. Source is optional to be filled in. Click “Commit” button. When finished with the window, click the “Done” button to close the window.
 Tracy
Tracy
Reader Comments