How to Set and Add Quality Controls Option
This guide walks you through setting the quality control options as well as adding new control tables and expressions.
The fourth main section is the Quality Control section. This section has two subsections: Options and Ladder and Controls. The Quality Control settings are used during the Quality Control Checks.
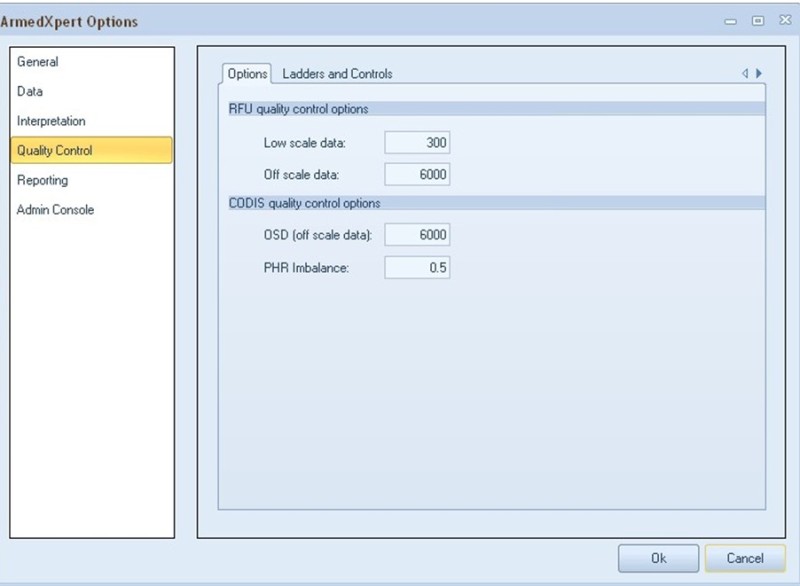
The first subsection, Options contains the settings that are used during certain RFU and CODIS Quality Control Checks.
The top section allows you to set the RFU quality control options. You can set the “Low scale data” figure and the “Off scale data” settings, by entering the required amount in each box. The bottom section allows you to set the CODIS quality control options. You can set the OSD (off scale data) and the PHR Imbalance settings, by entering the required amounts in each box.
The second subsection, Ladder and Controls contains the settings that are used during the Check Controls Quality Control Check.
The top portion has the Control qualifiers. These can be changed by clicking on the Expression column in the row that you would like to change and then change to the correct expression. The expressions are using regular expressions.
This allows for all controls to be picked up during the quality control check. For example, .“Ladder.” will pick up any control that contains the word Ladder, no matter what characters are before or after the word. These should only be changed if necessary. This is an advanced user form and should only be changed by those who understand regular expressions.
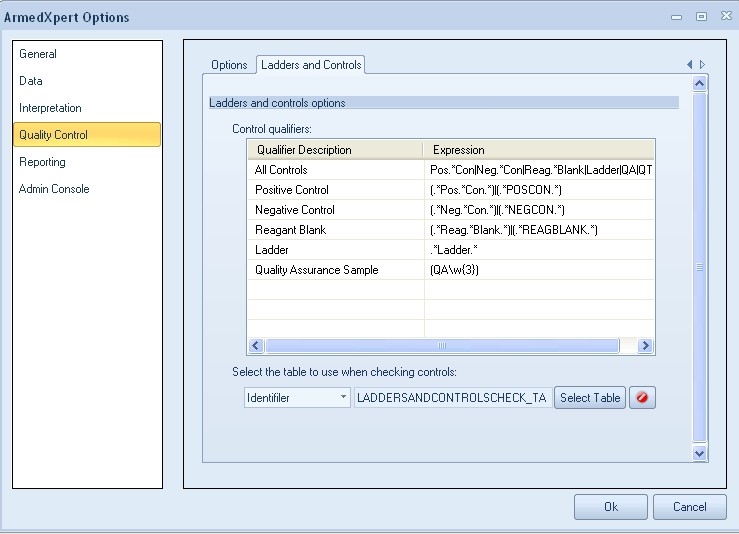
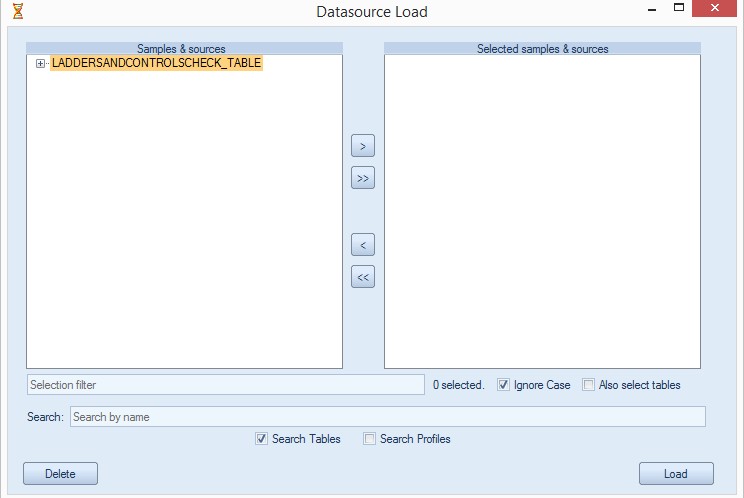
The bottom section allows you to select the table to use when checking controls. To add or change a table, choose the appropriate kit from the drop down list. Then click on the “Select Table" button. Click on the appropriate table on the left and click on the > button. The table will move to the box on the right. Click on the “Load” button to load the table.
Note: The table has to be committed to the database to appear in this window. If you have not committed the table you would like to use, go to the guide on how to Commit Samples to Data Source.
If you have another table for another kit, repeat these instructions to add the additional table(s).
 Tracy
Tracy
Reader Comments